Here is a picture of the prototype 6U motherboard:

To the left is the mic pre and at the bottom right you can see the EQ switches and their associated IDC headers (two per switch). You can also see, above the switches, a space for fitting an output transformer. This means a module can be completely self contained with transformer balanced inputs and outputs. Unfortunately there are no spare pins on the standard 32 way EZTubeMixer connector for a balanced output so, rather than change the original 32 way pin out, I have added a second 32 way connector. This will have the same basic pin out as the original but allocated differently. The mic and line balanced inputs can be used as inputs or as outputs. For example, you could have a balanced output from the mic pre which feeds an insert connected to the extra connector mic input pins. The balanced return would be fed to the extra connector balanced line input. You can see on the right hand side of the PCB where I have made provision for an extra input transformer for just this purpose. This would allow you to have a pre-EQ balanced insert or to use the mic pre and EQ independently.
After basic assembly, the PCB looks like this:
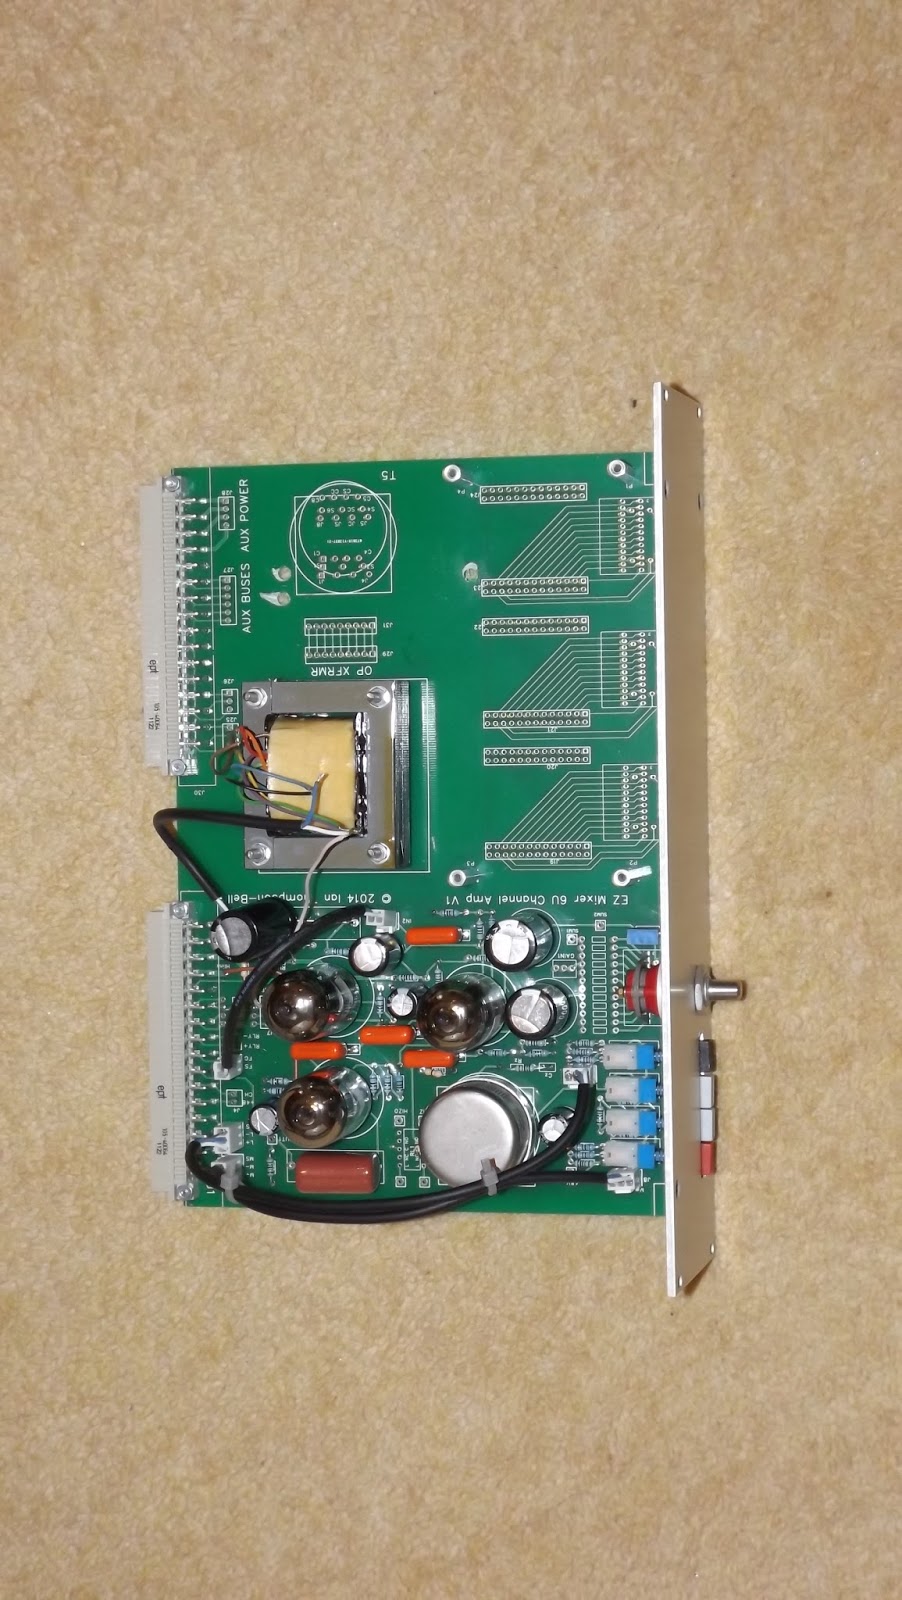
The uncommitted EQ switch and IDC headers idea is fine in theory but it did not work out in practice. The capacitance of the ribbon cable seriously upset the operation of the EQ, especially on the high frequency ranges and they also consume a lot of space on the EQ daughter-board. I wanted to retain the mother/daughter board flexibility, so I looked at simplifying the wiring between the two.
At that stage, the prototype 6U PCB had provision for three switches. Each one is tracked for two banks and up to 2 poles per back. Each bank is tracked to its own 26way IDC connector which means there is a total of six connectors.
The first EQ I worked on was the Helios 69 EQ daughter board. As the bass switch uses 2 banks it needs a pair of 26 way connections. These connectors take up a lot of room on the PCB, more than the switch would have done. There are only 26 connections required (two lots of 12 plus two commons) so a single 26 way connector would be sufficient. The only reason to have two 26 way connectors is if a four pole 6 way switch is required.
I therefore decided to review the switches used in the current range of EQs to see if it would be possible to use just a single 26 way connector per switch. The table below shows the switches used in the current EQs.
EQ
|
LO
|
MID
|
HI
|
OTHER
|
3B PULTEC
|
2P6W
|
1P12W
|
1P6W
| |
HELIOS 69
|
2P12W
|
1P12W
|
1P12W
| |
REDD
|
2P12W
|
2P12W
|
1P12W
|
2P6W
|
However, we never use both poles on the second bank, in fact we only ever use the first pole on the second bank when we use a 2P12W switch. This means we can forget the second pole in the second bank. Also, whatever switch we use, we always use the first pole on the first switch so this can be permanently tracked to the 26 way connector. Now all we are left with is selecting between the second pole on the first bank in the 2P6W. We can do this with a set of three pads and a link.
The 26 pins of the connector have been allocated as follows:
CONN PIN
|
SW PIN
|
CONN PIN
|
SW PIN
|
1
|
Bank 2 Pin1
|
2
|
Bank 1 Pin 1
|
3
|
Bank 2 Pin 2
|
4
|
Bank 1 Pin 2
|
5
|
Bank 2 Pin 3
|
6
|
Bank 1 Pin 3
|
7
|
Bank 2 Pin 4
|
8
|
Bank 1 Pin 4
|
9
|
Bank 2 Pin 5
|
10
|
Bank 1 Pin 5
|
11
|
Bank 2 Pin 6
|
12
|
Bank 1 Pin 6
|
13
|
Bank 2 Pin 7
|
14
|
Bank 1 Pin 7
|
15
|
Bank 2 Pin 8
|
16
|
Bank 1 Pin 8
|
17
|
Bank 2 Pin 9
|
18
|
Bank 1 Pin 9
|
19
|
Bank 2 Pin 10
|
20
|
Bank 1 Pin 10
|
21
|
Bank 2 Pin 11
|
22
|
Bank 1 Pin 11
|
23
|
Bank 2 Pin12
|
24
|
Bank 1 Pin 12
|
25
|
Bank 2 Com
|
26
|
Bank 1 Com
|
This scheme reduces the the number of connectors by half and would hopefully not affect the performance of the EQ. Here is a picture of the updated 6U PCB:

Des[ite all these efforts, the EQ performance was still compromised. So this scheme has been abandoned. Instead, each EQ type will have its own unique channel PCB. This means more PCBs have to be designed but it does mean the EQ will work as advertised. The first of these PCBs looks like this:

The mic pre section is unchanged but the EQ section now includes an almost complete Helios 69 style EQ. The only parts not on the PCB are the two pots, the peak/trough switch and the EQ in/out switches.. These will be connected to a very simple daughter board via a ribbon cable.
In parallel with this I have been developing the twin line channel (TLC) PCBs. These are intended to form the basis of a line in line out mixer with two AUX sends and a pan pot per channel with two channels to a module Again a mother board daughter board concept is used but there are far fewer connections between mother and daughter board then in the case of the standard channel module.The first of these developed was the REDD EQ. The reason is that these EQ sections can be cut and pasted between Channel and TLC mother boards so I only have to lay out each EQ once. Here is a picture of the prototype REDD EQ TLC:

The top of the PCB is essentially a standard Twin Line Amp (TLA). At the top left of the PCB are three pots; these are the two AUX sends and the pan pot. Below them is the channel mute switch. Below the mute switch are two preset pots that are used to set the gain of each half of the TLA so it can make up the loss in the EQ. These are arranged so as to be accessible through small holes in the front panel to simplify set up.
Below these is the EQ itself. It is a new version of the REDD EQ with all for switches in line. The top one is the 10KHz shelving EQ, the two middle ones are the mid boost/cut and mid frequency select switches and the bottom one is the 100Hz shelving EQ. The only component not on the PCB is the EQ in/out switch. If required this can be fitted directly to the front panel and wired to pads provided. It can be fitted in between the 10KHz switch and the gain trim pots.
Above and below the EQ are four holes labelled P1, P2, P3 and P4. These are for the pillars on which will be mounted the second identical EQ. SImilarly, there are two holes above and below the AUX and pan pots on which will be mounted the AUX send, pan pot and channel mute controls of the second channel. The daughter EQ connects to the second input transformer and the second gain make up amp of the TLA section
The EQ has already been commissioned and it works well. The next stage is to check out the AUX send and pan pots then develop the two mother board PCBs.